Wire Wrapping for Beginners: Which Wire, Which Gauge, and Your First Three Projects
Published
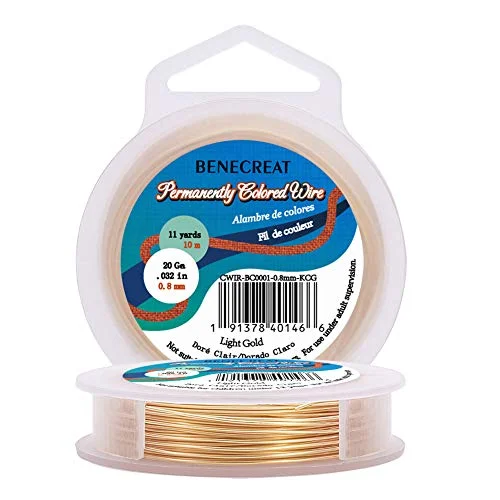
Start wire wrapping with dead-soft copper in two gauges: 20 gauge (0.8 mm) for frames and bails, 24 to 26 gauge for the wraps, plus three tools: round-nose pliers, chain-nose pliers, and flush cutters, which come together in a basic jewelry plier set. Practice on cheap wire, work in 5-to-6-inch lengths, and your first pendant takes an afternoon.
That paragraph is the whole shopping list. Everything below is why those numbers work, three projects with lengths and step counts, and the eight mistakes that separate a frustrating first weekend from a wearable one.
What Wire Wrapping Is, and the Two Schools You Will Run Into
Wire wrapping holds beads and stones with cold-formed wire alone: loops, coils, and wraps, no solder and no heat. That is why it is the classic starting point for jewelry making. You need three pliers, some wire, and something to wrap.
There are two traditions, and beginners get confused because tutorials from each camp contradict each other. The contemporary school works in round wire: a heavier frame wire shaped around the stone, a finer wire coiled or woven over it. The traditional cabochon school works in square and half-round wire: several square wires bundled flat against the stone and bound with half-round wire, which is why those wraps sit so flush and never roll off a smooth cab.
Start with round. It is cheaper, sold in every gauge, and every technique you learn in it transfers. Come back to square wire once your hands know a wrapped loop without thinking.
The Beginner’s Wire Shopping List
Gauge tells you thickness (lower number, thicker wire; our jewelry wire gauge chart converts every size to millimeters). Temper tells you how the wire behaves. For wrapping, the answer to temper is almost always dead soft.
| Job | Gauge | Temper | Shape | How much to start | BENECREAT wire |
|---|---|---|---|---|---|
| Frames, bails, pendant bases | 18 to 20 | Dead soft | Round | 30 feet | 20-gauge gold-plated copper, 33 feet |
| Wrapped loops, connectors, light frames | 22 | Dead soft (half hard for chain) | Round | 50 to 100 feet | 22-gauge tarnish-resistant copper, 164 feet |
| Coils, briolette wraps, small-hole beads | 24 to 26 | Dead soft | Round | 50 feet | 24-gauge variant of the 22-gauge spool |
| Weaving and lashing | 28 | Dead soft | Round | 100 feet | 28-gauge variant of the same spool |
| Rehearsing frames and bails | 18 | Soft by nature | Round | Any | 18-gauge aluminum, 307 feet |
Why copper first: it is inexpensive, malleable, and behaves like sterling, so every skill transfers when you upgrade. Plated and enamel-colored copper, which is what most craft wire is, gives you a gold or silver look at copper prices; the trade-off is a coating you must not scratch, covered below. Aluminum is even softer and never tarnishes, which makes it ideal for rehearsing a frame shape, and too soft for a frame you will wear.
Three Tools, One Afternoon
You need exactly three, and one upgrade is worth the money.
| Tool | What it does | Buying note |
|---|---|---|
| Round-nose pliers | Forms loops and curves; the taper sets the loop size | Inexpensive pairs work fine; a three-plier starter set covers all three rows |
| Chain-nose pliers | Grips, bends sharp angles, tucks ends | Smooth jaws, not serrated, or they mar the wire |
| Flush cutters | Cuts one side flat so ends sit flush and do not scratch | The tool to spend more on; cheap cutters leave sharp pinched ends. The Xuron 2175 Maxi-Shear cuts soft wire to 12 gauge and is the usual upgrade |
Nice-to-have, in order: nylon-jaw pliers (they will not scratch plated or colored wire), a ruler and permanent marker, a small file, and a set of mandrels, which can be a pen, a dowel, and a knitting needle. A rawhide mallet and a steel bench block come later, when you want to harden a frame without denting it.
Dead Soft or Half Hard?
Every bend hardens wire. That single fact settles most temper questions. Buy dead soft, and the frame you shape, wrap, and adjust ends up close to half hard by the time you are done, without ever fighting you. Buy half hard for wrapping and you will fight it on every coil.
The exception is a part that carries weight before you have had the chance to work it: the wrapped-loop connectors in a chain, and the hook of an earwire. Those are worth buying in half hard, or forming in dead soft and hammering lightly to stiffen.
Two habits protect soft wire from its own weakness. Work in 5-to-6-inch lengths for wraps and coils, because a long tail flexes constantly and hardens before you finish. And never wrap and unwrap the same spot: bend it once, correctly, or cut it and start again.
Project 1: The Wrapped Loop
The wrapped loop is the connector behind rosary chain, bracelet links, and every dangle earring, and it is the move to master first. Twenty-two gauge is the easiest gauge to learn it in.
- Cut a 3-inch piece and mark the midpoint.
- Grip at the mark with round-nose pliers and bend the wire to 90 degrees.
- Wrap the tail over the top jaw to form a loop about 2 mm across.
- Hold the loop flat in chain-nose pliers and coil the tail three times down the stem, tight to the loop.
- Trim flush and press the cut end in with the chain-nose tips.
- Thread a bead and repeat on the other side, catching the previous link before you close.
Twelve of these with 3 mm beads make a 7-inch bracelet chain, and 164 feet of 22 gauge cuts into more than 600 of those 3-inch pieces. When the loops come out matched, you are ready for a stone.
Project 2: A Tumbled Stone Pendant With No Holes
This is the pendant most people picture when they hear “wire wrapped.” It needs one length of 20-gauge dead-soft wire, about 12 inches (30 cm), and a tumbled stone around an inch long with a tapered bottom so the wire has something to grip.
- Fold the wire at its midpoint around a 4 mm mandrel to form a small loop.
- Twist the two tails together for about 1 inch below the loop; this becomes the bail.
- Open the tails out and shape the bail over a 7 mm dowel so a chain will pass through.
- Set the stone’s top against the bail and cross the two wires over its front.
- Bring them around the back, cross again, and pull snug (snug, not strangled).
- Return to the front and cross once more lower down, so the stone sits in an X front and back.
- Take each tail up and through the bail loop from opposite sides.
- Trim each tail to about 2 mm and pinch the end flat against the bail with chain-nose pliers.
- Check for any rough end and tuck it.
- Hang it and adjust the crosses until the stone cannot slide.
Thirty-three feet of 20 gauge is roughly thirty of these pendants, which is exactly why a single spool of the 20-gauge gold-plated copper lasts a beginner so long.
Project 3: Wrapped Briolette Earrings
A top-drilled briolette or crystal point is the friendliest stone of all, because the hole does the holding.
- Cut 3 to 4 inches of 24-gauge wire and thread it through the hole, leaving one tail longer.
- Bring both tails up and cross them above the stone’s point.
- Bend the short tail straight up along the centerline and wrap the long tail around it two or three times, closing the gap above the stone.
- Trim the wrapping tail flush and tuck the end.
- Form a wrapped loop at the top of the upright wire, exactly as in Project 1, so the loop can take an earwire.
- Repeat for the pair, then hang each on a 20-gauge earwire.
For briolettes with very small holes, drop to 26 or 28 gauge; the finer wire threads where 24 will not.
Eight Mistakes Every Beginner Makes
| Mistake | What you see | Fix |
|---|---|---|
| Kinking the wire | A sharp bend that never straightens and later snaps | Run new wire between finger and thumb before use; never uncoil by pulling |
| Overworking one spot | Wire goes stiff, then cracks | Bend once; work in 5-to-6-inch lengths; cut and restart rather than rework |
| Bare steel pliers on plated wire | Scratches and flaked coating | Nylon-jaw pliers, or tape the jaws; grip lightly |
| Frame gauge too thin | Pendant flexes and the stone slides | 20 gauge minimum for a frame or top loop; 18 for a heavy stone |
| Loose coils | Gaps between wraps, wraps that spin | Tighten every two or three wraps with chain-nose pliers before continuing |
| Sharp ends | Snagged sweaters, scratched skin | Flush cutters, cut side toward the piece; tuck or file every end |
| Wrapping too tight | Cracked or chipped stone | Snug the wire, do not crank it; softer stones need a gentler hand |
| Starting with an irregular stone | Nothing sits still, nothing looks right | First stone: an oval or teardrop with a tapered bottom |
Plated and Colored Wire: Handle With Care
Most affordable “gold” and “silver” craft wire is copper underneath a coating. Gold-plated wire carries a thin layer of real gold; enamel-colored wire carries a permanent colored coating; both are tarnish resistant, both look good, and both have the same rule: the coating is the finish, so do not scratch it. Use nylon-jaw pliers or taped jaws, grip lightly, and skip any technique that involves filing or applying a patina, because you would cut straight through the color. Our tarnish-resistant copper wire is exactly this kind of wire, and it is the reason a beginner can make a gold-tone bracelet without the price of gold-filled.
How Much Wire a Spool Buys You
Wire math keeps you from running out mid-project. Thirty-three feet of 20-gauge is about thirty simple stone pendants at 12 inches each, or twice that many frames for smaller stones. One hundred sixty-four feet of 22-gauge is about 650 three-inch connector pieces, enough wrapped loops for a year of bracelets. And 307 feet of 18-gauge aluminum is more rehearsal wire than most people use in a lifetime, which is the point: make the mistakes in aluminum, then cut the copper.
Sources
Project steps and lengths are consolidated from published tutorials: the wrapped-loop connector method at Door 44 Studios, the tumbled-stone pendant tutorial on the Folksy blog, and the traditional square-wire cabochon method on Instructables. Gauge, temper, and tool guidance reflects the consensus of established wire-jewelry references; product specifications come from current BENECREAT listings.
Frequently Asked Questions
Is wire wrapping hard to learn?
No, it is the easiest way into jewelry making because it needs no torch, no solder, and only three tools. What takes time is control: the first loops come out uneven and the first coils gap. Two things shorten the curve dramatically. Buy dead-soft copper in the right gauges so the wire cooperates, and practice each move on scrap before it goes near a stone. Most beginners finish a wearable wrapped-loop bracelet on day one and a stone pendant within a week.
What gauge wire is best for wire wrapping?
Two gauges cover a beginner's first year: 20 gauge (0.8 mm) for frames, bails, and anything that holds a stone, and 24 to 26 gauge (0.5 to 0.4 mm) for the decorative wraps and coils around it. Twenty-two gauge is the crossover size that makes wrapped loops and light frames, and 28 gauge is where weaving starts. Wire heavier than 18 gauge is hard to bend by hand, and wire finer than 26 gauge snaps if you kink it.
Should beginners use dead soft or half hard wire?
Dead soft, for almost everything. It bends by hand, coils tightly, and hardens on its own as you work it, so a frame you have shaped and wrapped ends up stiff enough to wear. Half hard is worth buying for the one job that carries weight before you have had a chance to work-harden it: wrapped-loop connectors and earwire hooks. Never buy full hard for wrapping; it fights every bend and cracks at the loops.
Round or square wire for wire wrapping?
Round wire to start. It is cheaper, sold everywhere, and is what nearly every contemporary tutorial uses. Square and half-round wire belong to the traditional cabochon-wrapping style: square wires bundle flat against the stone and half-round wire binds the bundle, which is why they do not roll off a smooth cab. Learn loops, coils, and a simple pendant in round wire first, then try a square-wire bezel once your hands know the moves.
What are common wire wrapping mistakes?
Kinking the wire and trying to straighten it, working one spot until it hardens and snaps, marring wire with bare steel pliers, choosing a frame gauge too thin to hold the stone, leaving coils loose instead of tightening every two or three wraps, leaving sharp ends that catch skin, pulling the wire so tight it cracks a fragile stone, and starting with an irregular stone instead of an oval or teardrop. Every one of them has a two-second fix once you know it is coming.
How do you wire wrap a crystal for beginners?
Pick the shape first. A tumbled stone with a tapered bottom wraps in one 12-inch length of 20-gauge dead-soft wire: fold it at the midpoint, twist a bail, cross the wires over the front and back, and lock the ends through the bail. A top-drilled crystal point or briolette is easier still: thread 3 to 4 inches of 24-gauge wire through the hole, cross the ends, wrap one around the other, and finish with a wrapped loop. Round, undrilled spheres need a cage and are a third project, not a first one.
Can you wire wrap with aluminum wire?
For practice and decorative pieces, yes; for jewelry you wear daily, no. Aluminum is very soft, so it teaches frame bends and bail shaping cheaply and forgives mistakes, and it never tarnishes. The same softness means a wrapped aluminum frame bends open under a heavy stone and marks easily. Rehearse a design in aluminum, then make the wearable version in copper.
How much wire do I need for a wire-wrapped pendant?
About 12 inches (30 cm) of 20-gauge wire for a simple wrapped tumbled stone around an inch long, 3 inches of 22-gauge per wrapped-loop connector, and 3 to 4 inches of 24-gauge per briolette. Traditional square-wire cabochon bezels use more: four lengths of the stone's circumference plus 12 to 14 inches each, and a few short pieces of half-round for the bindings. Cut generously; a spare inch is cheaper than a wrap you cannot finish.
The frame wire beginners finish first
BENECREAT 20-gauge real-gold-plated copper wire, 33 feet on a spool: the base gauge for wrapped pendants, bails, and frames, soft enough to shape by hand and pretty enough to wear.
See the 20-gauge spool